Does your RV bathroom feel a little drab? Maybe it’s chipped, stained, or just plain boring. You want to give it a fresh new look, but choosing the right paint can feel like a confusing puzzle. There are so many types of paint out there, and you need one that can handle moisture and won’t peel off in your mobile home. It’s a common problem for RV owners who want their living space to feel like a true home away from home.
But don’t worry, transforming your RV bathroom doesn’t have to be a headache! In this post, we’re going to break down exactly what you need to know about picking the perfect paint for your RV bathroom. We’ll explore the best options that stand up to humidity and wear, and give you tips to make sure your paint job looks fantastic and lasts.
By the time you finish reading, you’ll feel confident in your choice. You’ll learn about the materials, colors, and application techniques that will help you create a beautiful, functional bathroom in your RV. Let’s dive in and get your RV bathroom looking its best!
Our Top 5 Paint For Rv Bathroom Recommendations at a Glance
Top 5 Paint For Rv Bathroom Detailed Reviews
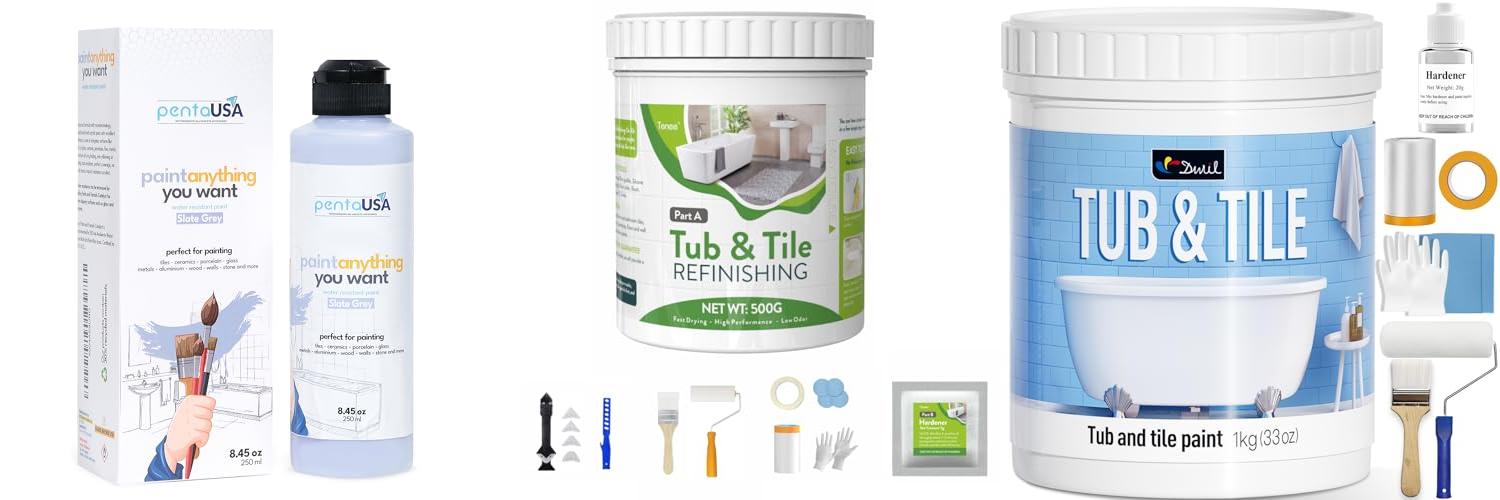
1. PENTAUSA All in One Paint – Slate Grey

Rating: 8.8/10
Transform your home with PENTAUSA All in One Paint in Slate Grey! This amazing paint lets you change almost anything. It’s perfect for bathrooms, kitchens, and even outdoor furniture. Get ready to make your old tubs, tiles, sinks, and cabinets look brand new. This paint is tough and can handle wet spots, so your projects will last.
What We Like:
- You can paint almost anything, from tubs and tiles to cabinets and wood.
- It’s waterproof and great for wet areas like bathrooms and kitchens.
- Mix it with other colors to create your own special shades.
- The paint sticks well and resists scratches and stains.
- It covers about 43 square feet with one coat.
What Could Be Improved:
- You need to mix the paint with a catalyst and use it within 12 hours.
- Using the right tools, like a soft brush and velvet roller, is important to avoid marks.
This PENTAUSA paint makes DIY projects easy and fun. You can give your home a fresh, waterproof look without a lot of hassle.
2. Tenee 17oz White Tub and Tile Refinishing Kit with 8 Tools

Rating: 8.8/10
Tired of a dull, outdated bathroom? The Tenee 17oz White Tub and Tile Refinishing Kit is your secret weapon for a fresh, like-new look without the high cost of replacement. This kit is designed to transform your porcelain, ceramic, fiberglass, and even kitchen surfaces, giving them a beautiful semi-gloss finish. It’s an easy way to update your bathtub, shower, sink, or vanity and make your bathroom shine again.
What We Like:
- It makes old tubs and tiles look like new again.
- You don’t need to be a pro to use it; it’s simple to apply.
- The kit comes with everything you need, including tools like rollers, brushes, and sandpaper.
- The finished coating is tough and can handle water, moisture, and cleaning.
- It dries fast and doesn’t have a strong smell, making it eco-friendly.
- The paint sticks well and resists scratches.
What Could Be Improved:
- The paint needs about 7 days to fully harden, so you can’t use the refinished item right away.
- While it’s low odor, some users might still prefer even less scent.
This Tenee refinishing kit offers a budget-friendly and straightforward solution for bathroom updates. You can achieve a professional-looking finish and extend the life of your surfaces with this all-in-one package.
3. DWIL Tub and Tile Refinishing Kit

Rating: 9.0/10
Revitalize your bathroom and kitchen with the DWIL Tub and Tile Refinishing Kit. This kit is designed to give your old, tired surfaces a fresh, new look. It’s a water-based, semi-gloss white paint that works wonders on sinks, bathtubs, and tiles. You can even use it on floors and walls to update your space without major renovations.
What We Like:
- Versatile Application: This paint works on many surfaces like tile, wood, glass, ceramics, acrylic, and marble. You can refresh sinks, floors, bathtubs, and walls.
- Complete Kit: The 33 oz can covers a good area, and the kit includes everything you need: a roller, brush, gloves, masking tape, masking film, and sandpapers. This makes your project much easier.
- Pleasant to Use: The paint has a low odor and very few volatile organic compounds (VOCs). This means you won’t be bothered by strong fumes while you paint, even in small rooms.
- Durable and Waterproof: The water-based acrylic formula makes the paint waterproof and resistant to peeling. Your refreshed surfaces will last a long time and look great.
- Fast Drying: You only need to wait about 2 hours between coats and 24 hours for the paint to fully cure. Your bathroom or kitchen will be ready to use again in just 7 days.
What Could Be Improved:
- Surface Limitations: It’s important to note that this paint is not suitable for artificial marble, metal, or surfaces that are powdery or peeling. Also, while it works on cast iron tubs with enamel, it won’t work on regular iron tubs.
This DWIL kit offers a convenient and effective way to update your home. It’s a great choice for DIYers looking for a budget-friendly refresh.
4. SENVEN Tub and Tile Spray Paint Black Gloss Aerosol Spray Tile Paint Bathtub Refinishing Kit for Tiles Ceramic Porcelain Fiberglass Resurfacing Bathroom Walls Bathtubs Sinks Countertops Toilets

Rating: 9.1/10
Give your bathroom a fresh, new look with the SENVEN Tub and Tile Spray Paint in Black Gloss. This easy-to-use kit lets you refinish ceramic, porcelain, and fiberglass surfaces like bathtubs, tiles, sinks, and countertops. It’s a budget-friendly way to update your bathroom without the cost of new fixtures or hiring a professional.
What We Like:
- Works on ceramic, porcelain, and fiberglass surfaces like tubs, tiles, sinks, and countertops.
- Saves money compared to buying new fixtures or hiring contractors.
- Offers great scratch and abrasion resistance, perfect for humid bathrooms.
- Chip-resistant and won’t peel, even with hot water.
- Dries quickly and provides a durable, semi-gloss porcelain-like finish.
- Easy to apply with a uniform spray for a smooth finish.
What Could Be Improved:
- Requires good ventilation and a respirator due to a strong odor.
- Needs proper drying time (3 days before water exposure) for best results.
- Coverage is dependent on the number of coats applied.
The SENVEN Tub and Tile Spray Paint is a fantastic DIY solution for a quick bathroom refresh. Just remember to follow the drying instructions for a lasting, beautiful finish.
5. Tub and Tile Paint 16.5 oz

Rating: 8.9/10
Give your bathroom and kitchen a fresh new look with this Tub and Tile Paint! This kit helps you refinish tubs, sinks, and tiles without the hassle of replacement. It’s designed to be easy to use and provides a durable, beautiful finish.
What We Like:
- Advanced Acrylic Formula: This paint uses a strong acrylic formula. It makes the finish tough and lasts a long time. It helps stop peeling and wear.
- Low Odor: The paint is water-based. It doesn’t have strong smells or harmful fumes. This makes it safe to use inside your home, even with kids and pets around.
- Easy Cleanup: Spills wipe away easily with just water. You don’t need special cleaners. This saves you time and effort.
- Good Coverage: One 16.5oz bottle covers 25-30 square feet. You can choose from white, light gray, or black to match your style.
- Versatile Use: You can use it on many surfaces like tiles, wood, glass, ceramic, acrylic, and marble. It can even refresh cast iron tubs with porcelain enamel.
What Could Be Improved:
- Curing Time: You need to wait 24-36 hours before using your tub again. It takes a full 7 days to fully cure, meaning no scrubbing during that time.
- Surface Limitations: It’s not for artificial marble, metal, or surfaces that are powdery or peeling. You also can’t use it on regular iron tubs.
This tub and tile paint is a fantastic way to update your space. It offers a simple solution for a quick and attractive renovation.
Choosing the Right Paint for Your RV Bathroom: A Comprehensive Guide
Your RV bathroom sees a lot of action. It needs to be durable, easy to clean, and look great. Picking the right paint is crucial for a successful renovation. This guide will help you make the best choice for your mobile oasis.
Key Features to Look For
When you’re shopping for RV bathroom paint, keep these important features in mind:
- Durability and Washability: Bathrooms are damp and prone to splashes. You need a paint that can handle frequent cleaning without peeling or fading. Look for paints labeled “scrubbable” or “washable.”
- Moisture and Mildew Resistance: RV bathrooms can get steamy. Paint that fights off moisture and prevents mildew growth is essential. Many paints have built-in mildewcide.
- Adhesion: The paint needs to stick well to the surfaces in your RV bathroom. This includes fiberglass, laminate, and sometimes even old paint. Good adhesion means the paint won’t chip or peel easily.
- Low VOCs (Volatile Organic Compounds): RVs have limited ventilation. Paints with low VOCs are better for your health and the air quality inside your rig.
- Finish: The sheen of the paint affects its durability and how easy it is to clean. Satin or semi-gloss finishes are usually best for bathrooms because they are more resistant to moisture and easier to wipe down than flat finishes.
Important Materials
The type of paint you choose is determined by its base.
- Latex Paint: This is the most common and versatile choice for RV bathrooms. Latex paints are water-based, which makes them easy to clean up. They are also flexible, which is good for RVs that can flex a bit as you drive. Look for 100% acrylic latex for the best durability.
- Enamel Paint: Enamel paints are known for their toughness and resistance to moisture. Some enamels are oil-based, which can be harder to clean up but offer a very hard, durable finish. However, many modern enamels are water-based and offer the best of both worlds.
Factors That Improve or Reduce Quality
Several things can make your paint job great or cause problems.
- Preparation is Key: Proper surface preparation is the most important factor for a quality paint job. This means cleaning surfaces thoroughly, sanding lightly if needed, and using a good primer. Skipping these steps will lead to poor adhesion and a short-lived paint job.
- Primer: Using the right primer is vital. A good bonding primer will help the paint stick to tricky surfaces like laminate or fiberglass. It also helps cover up stains and create a uniform base for your topcoat.
- Number of Coats: Applying enough coats is crucial for durability and even color. Most bathroom surfaces will need at least two coats of paint for full coverage and protection.
- Application Method: Using the right tools, like high-quality brushes and rollers, makes a big difference. Applying paint too thinly or too thickly can also affect the final result.
User Experience and Use Cases
People use RV bathroom paint for various projects.
- Full Bathroom Makeovers: Many RV owners repaint their entire bathroom to update the look. They often choose bright, clean colors to make the space feel larger.
- Cabinet and Vanity Refreshes: Painting cabinets and vanities is a popular and cost-effective way to update the bathroom. The durable finishes stand up well to daily use.
- Tile and Grout Painting: Some paints are designed to be used on tile. These can transform outdated tilework without the mess of replacement. However, careful prep and the right product are essential here.
- Shower Walls: For shower walls, you need a paint specifically designed for high-moisture areas. These paints offer excellent water resistance and mildew protection.
Frequently Asked Questions (FAQ) for RV Bathroom Paint
Q: What is the best type of paint for an RV bathroom?
A: The best type of paint is usually a 100% acrylic latex paint with a satin or semi-gloss finish. These paints are durable, washable, and resistant to moisture.
Q: Do I need a special primer for RV bathroom surfaces?
A: Yes, it’s often recommended to use a bonding primer, especially on surfaces like laminate or fiberglass. This helps the paint adhere properly.
Q: Can I paint over old wallpaper in my RV bathroom?
A: It’s best to remove old wallpaper first. If you can’t remove it all, ensure it’s very clean and smooth, then use a good primer designed for wallpaper.
Q: How do I prepare my RV bathroom walls for painting?
A: Clean the walls thoroughly with a degreaser, sand any glossy surfaces lightly, and wipe down with a damp cloth. Apply primer after the walls are dry.
Q: How many coats of paint should I apply?
A: Generally, two coats are recommended for good coverage and durability. Some surfaces might need a third coat.
Q: Is it okay to use regular house paint in my RV bathroom?
A: While some house paints might work, paints designed for high-moisture areas or with specific RV-friendly properties are usually a better choice for longevity and performance.
Q: How long does RV bathroom paint typically last?
A: With proper preparation and application, RV bathroom paint can last for several years, but this can vary based on usage and environmental factors.
Q: Can I paint my RV shower stall?
A: Yes, but you need to use a paint specifically formulated for showers or high-moisture areas, often called a “tub and tile” or “shower paint.”
Q: What is the best way to clean painted RV bathroom surfaces?
A: Use a soft cloth or sponge with mild soap and water. Avoid abrasive cleaners or scrub brushes, which can damage the paint finish.
Q: Should I use a matte, satin, or gloss finish for my RV bathroom?
A: Satin or semi-gloss finishes are recommended for RV bathrooms. They are more durable, easier to clean, and more resistant to moisture and mildew than matte finishes.
In conclusion, every product has unique features and benefits. We hope this review helps you decide if it meets your needs. An informed choice ensures the best experience.
If you have any questions or feedback, please share them in the comments. Your input helps everyone. Thank you for reading.

I’m the recipe developer and food photographer behind Air Fryer at Tiffany’s. I’m also a wife, mom to two adventurous little boys, registered nurse, and live in the great Midwest. Join me as I show you new ways to use your air fryer that you never knew possible.