Have you ever walked into a bar and been mesmerized by the glossy, vibrant surface of the bar top? Maybe you even thought, “I wish I could make something like that!” Well, you can! Epoxy resin is the secret ingredient behind those stunning bar tops. It’s tough, beautiful, and can transform plain wood or other materials into a show-stopping centerpiece.
Choosing the right epoxy resin for your bar top project can feel overwhelming. There are so many types, brands, and techniques! Some resins yellow over time, while others scratch easily. Figuring out which one is best for your needs, and how to apply it properly, can be a real headache. You don’t want to waste time and money on a project that doesn’t turn out the way you want it to.
In this blog post, we’ll cut through the confusion. We’ll explore everything you need to know about epoxy resin for bar tops. You’ll learn about different types of resin, how to pick the best one for your project, and the steps to create a professional-looking bar top. Get ready to learn the tricks of the trade and gain the confidence to make your own amazing bar top!
Let’s dive into the world of epoxy resin and discover how you can create a bar top that will be the envy of all your friends!
Our Top 5 Epoxy Resin For Bar Tops Recommendations at a Glance
Top 5 Epoxy Resin For Bar Tops Detailed Reviews
1. 68oz Crystal Clear Resin Kit

Rating: 8.7/10
Unleash your inner artist with the 68oz Crystal Clear Resin Kit! This kit is perfect for coating, casting, and creating beautiful projects. You can use it for table tops, DIY crafts, and resin art. The resin is crystal clear and won’t yellow over time. It’s easy to use, even if you are new to resin. Get ready to make stunning, high-gloss creations!
What We Like:
- EASY TO USE: Mix the resin and hardener in a 1:1 ratio. It’s that simple!
- FAST CURE: The resin cures quickly, usually within 8-24 hours.
- CRYSTAL CLEAR: Get a glass-like finish that is super clear and won’t turn yellow.
- NO BUBBLES: The special formula prevents bubbles from forming.
- SAFE AND ODORLESS: The epoxy is non-toxic and doesn’t have a strong smell.
- VERSATILE: Use it for many DIY projects, from jewelry to tabletops.
- BEGINNER FRIENDLY: You have 40 minutes to work with the resin.
- HEAT RESISTANT: The resin can handle heat up to 203°F (95°C).
- STRONG GLOSS: The finish is hard and has a long-lasting shine.
What Could Be Improved:
- Curing time can vary, so follow instructions carefully.
This resin kit is a great choice for both beginners and experienced artists. It’s easy to use and creates beautiful, long-lasting results. Get creative and make your next project shine!
2. Epoxy Resin Kit 1 Gallon-Crystal Clear

Rating: 8.9/10
The Epoxy Resin Kit 1 Gallon is a fantastic choice for anyone who loves arts and crafts. This kit is perfect for making beautiful tabletops, jewelry, and more. It’s crystal clear, UV resistant, and even food safe! You can use it with mica powder, silicone molds, and alcohol ink to create amazing projects. This kit makes crafting fun and easy.
What We Like:
- Easy to use! The 1:1 mixing ratio makes application simple for beginners.
- It is food safe. You can use it on kitchen tables and bar tops.
- The resin is self-leveling. You will get a smooth, shiny finish.
- It creates a crystal-clear, glossy look. Your projects will look professional.
- It protects your art from water damage. Your creations will last a long time.
- It’s made in the USA. You know you are getting a quality product from a company with experience.
What Could Be Improved:
- (No cons mentioned in the provided text.)
This epoxy resin kit is a great option for your next art project. It is easy to use and creates beautiful results. You will love it!
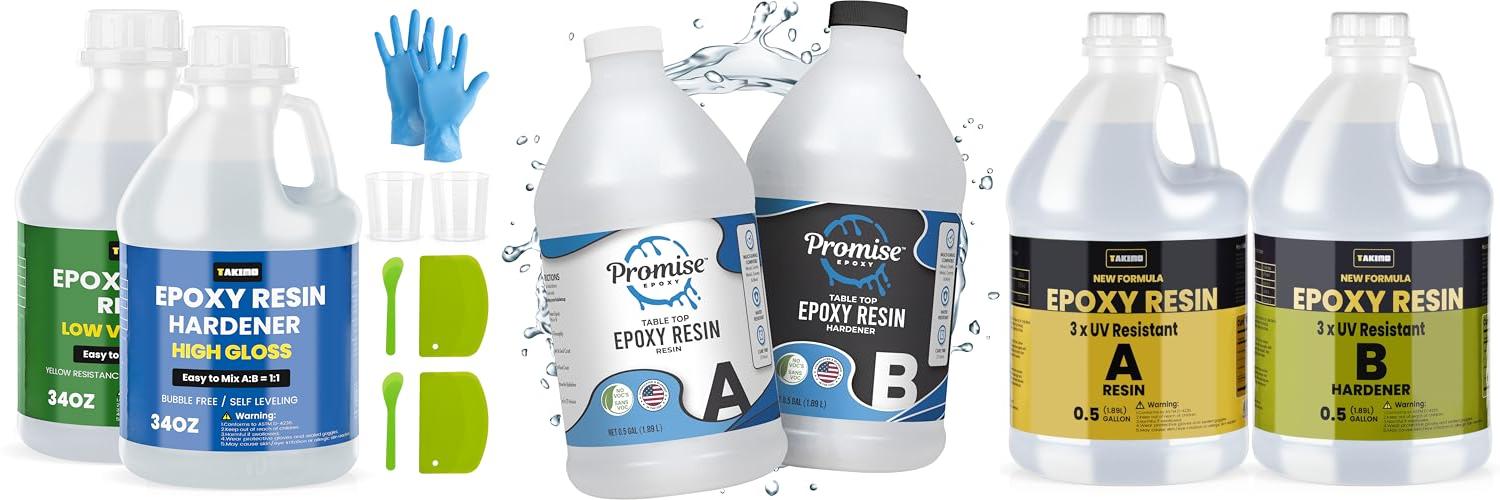
3. TAKIMO 1 Gallon 3×UV Resistant Resin Kit

Rating: 9.2/10
The TAKIMO 1 Gallon 3×UV Resistant Resin Kit is perfect for all your DIY resin projects. This kit includes clear resin and hardener. You mix them in a 1:1 ratio. It cures fast, usually in 8-24 hours. This resin is great for beginners and experts. You can make things like jewelry, coasters, and table tops with it. It gives a super shiny, glass-like finish that lasts. The resin is also UV resistant, so it won’t turn yellow.
What We Like:
- Easy to use, even if you’re new to resin.
- Cures quickly.
- Has a super glossy finish.
- Resists yellowing from the sun.
- Doesn’t have bubbles.
- Safe and non-toxic.
- Great for many different projects.
- Comes with a one-year guarantee.
What Could Be Improved:
- Following the instructions carefully is important.
This TAKIMO resin kit is a great choice for anyone who loves DIY projects. It’s easy to use and gives amazing results. You can create beautiful, long-lasting art with it.
4. 68OZ 3×UV Resistant Resin Kit

Rating: 8.6/10
Unleash your inner artist with the 68OZ 3×UV Resistant Resin Kit! This kit gives you everything you need for stunning resin projects. It’s perfect for beginners and pros alike. Create beautiful jewelry, coasters, table tops, and more. This crystal-clear epoxy resin is easy to use and creates a high-gloss finish. It also resists yellowing from the sun. Get ready to make amazing things!
What We Like:
- Easy to use! Just mix the resin and hardener in a 1:1 ratio.
- Cures fast! Your project will be ready in 8-24 hours.
- It’s super clear and has a glass-like finish.
- It resists yellowing from UV light.
- Bubbles are not a problem, thanks to the defoamer!
- It’s safe to use, with no strong smells.
- You have 40 minutes to work before it starts to cure.
- It works well with silicone molds.
- The manufacturer offers a one-year warranty.
What Could Be Improved:
- Following instructions is important, especially in cold weather.
This resin kit is a fantastic choice for anyone who loves DIY projects. The easy-to-use formula and beautiful results make it a winner!
5. Stone Coat Countertops Ultimate Top Coat Epoxy – DIY Epoxy Resin Kit with Extra Scratch Resistance and UV Resistance for Protecting Your Surface! (Glossy Finish)

Rating: 8.9/10
Stone Coat Countertops Ultimate Top Coat Epoxy is a DIY kit. It gives your surfaces a glossy finish. This kit protects your work from scratches and UV rays. It is great for table tops, bar tables, and art projects. The kit is made for easy application and long-lasting results.
What We Like:
- The glossy finish looks great!
- It protects surfaces from scratches.
- It resists heat and UV rays.
- Easy to apply with a roller kit.
- It dries quickly. You can use it in about a day.
- It makes your epoxy last longer.
What Could Be Improved:
- The description doesn’t mention the specific tools needed for the application process beyond the roller.
This Ultimate Top Coat is a good choice for protecting your epoxy projects. It is easy to use and makes your work look great. If you want a shiny and strong finish, this kit is for you!
Epoxy Resin for Bar Tops: A Buying Guide
Building a bar top is a fun project. Epoxy resin can make it look amazing! This guide helps you choose the right epoxy resin for your project.
Key Features to Look For
Choosing the right epoxy is important. Here are some key features to consider:
- UV Resistance: Sunlight can damage epoxy. Look for epoxy with UV resistance. This helps prevent yellowing or cracking.
- Self-Leveling: This means the epoxy spreads out smoothly. It creates a level surface on its own.
- Bubble Release: Bubbles can ruin the look of your bar top. Good epoxy releases bubbles easily.
- Durability: Your bar top needs to be tough. Epoxy should be scratch-resistant and able to handle spills.
- Working Time: This is the time you have to work with the epoxy before it hardens. Choose an epoxy with a working time that fits your needs.
- Cure Time: This is how long it takes the epoxy to fully harden. Consider the cure time when planning your project.
Important Materials You’ll Need
You need more than just epoxy! Here’s what you’ll need:
- Epoxy Resin and Hardener: This is the main ingredient. You mix these two parts together.
- Mixing Cups and Sticks: Use these to measure and mix the epoxy. Don’t use anything that’s not disposable.
- Leveling Tools: A level is very important. You’ll use it to make sure your bar top is flat. A heat gun can help get rid of bubbles.
- Safety Gear: Always wear gloves and eye protection. A respirator is recommended, especially in a poorly ventilated area.
- Surface to Pour On: You need something to pour the epoxy on. This could be wood, concrete, or another material. Prepare the surface properly. Sand it down and clean it.
- Tape: Use tape to seal the edges of your bar top. This helps contain the epoxy.
Factors that Improve or Reduce Quality
Several things can affect the quality of your bar top:
- Proper Mixing: Mix the epoxy and hardener thoroughly. This is very important. If you don’t mix them well, the epoxy won’t cure properly.
- Surface Preparation: A clean and prepared surface is key. Sanding and cleaning helps the epoxy bond.
- Environmental Conditions: Work in a dust-free area. Temperature and humidity can affect the epoxy’s curing process.
- Using the Right Amount: Follow the manufacturer’s instructions. Use the correct ratio of resin to hardener.
- Avoiding Bubbles: Use a heat gun to remove bubbles. You can also let the epoxy sit for a few minutes before pouring. This allows some bubbles to rise.
- Applying in Thin Layers: Applying epoxy in multiple thin layers is better. This reduces the risk of bubbles and helps it cure evenly.
User Experience and Use Cases
Using epoxy resin for bar tops is popular. People love the look!
- DIY Projects: Many people build their own bar tops. Epoxy is great for beginners and experts.
- Commercial Bars: Epoxy is durable and looks great. It’s often used in bars and restaurants.
- Creative Designs: You can add color, glitter, or other items to the epoxy. This lets you create unique designs.
- Easy to Clean: Epoxy surfaces are easy to wipe clean. Spills are not a problem.
- Long-lasting: Properly applied epoxy is very durable and can last for years.
Frequently Asked Questions (FAQ)
Q: What is the best type of epoxy for bar tops?
A: Look for epoxy that is UV resistant, self-leveling, and durable. Many brands offer options designed specifically for bar tops.
Q: How much epoxy do I need?
A: Calculate the surface area of your bar top. Then, check the epoxy’s coverage rate. You’ll need enough to achieve the desired thickness, usually 1/8 inch.
Q: How do I remove bubbles from epoxy?
A: Use a heat gun or a torch. Hold it a few inches above the surface. Move it slowly across the epoxy to pop the bubbles.
Q: How long does epoxy take to cure?
A: Cure times vary. Most epoxy takes 24-72 hours to cure enough to handle. It can take several days to reach its full hardness.
Q: Can I add color to the epoxy?
A: Yes! You can use epoxy-safe pigments, dyes, or mica powders to add color. Always check the manufacturer’s recommendations.
Q: How do I prepare the surface for epoxy?
A: Sand the surface to create a rough texture. Clean it thoroughly to remove dust and debris. You want the epoxy to bond properly.
Q: What safety gear do I need?
A: Always wear gloves, eye protection, and a respirator. Work in a well-ventilated area.
Q: Can I pour epoxy over an existing bar top?
A: Yes, you can. Make sure the existing surface is clean, level, and properly prepared. It needs to be sanded first.
Q: How do I clean an epoxy bar top?
A: Use mild soap and water. Avoid harsh chemicals or abrasive cleaners that could scratch the surface.
Q: What if the epoxy doesn’t cure?
A: This usually means you didn’t mix the resin and hardener correctly. Sometimes, the temperature is too low. Try to make sure you’ve measured the ingredients correctly and are in the right conditions.
In conclusion, every product has unique features and benefits. We hope this review helps you decide if it meets your needs. An informed choice ensures the best experience.
If you have any questions or feedback, please share them in the comments. Your input helps everyone. Thank you for reading.

I’m the recipe developer and food photographer behind Air Fryer at Tiffany’s. I’m also a wife, mom to two adventurous little boys, registered nurse, and live in the great Midwest. Join me as I show you new ways to use your air fryer that you never knew possible.