Have you ever wished you could scribble brilliant ideas directly onto your walls? Imagine a space where brainstorming sessions are endless, to-do lists magically appear, and doodles come to life without a trace. Dry erase paint makes this dream a reality!
Choosing the right dry erase paint can be tricky. You might wonder about the best brand, how much to buy, or if it’s easy to apply. The choices can feel overwhelming! You don’t want a paint that streaks, ghosts, or doesn’t erase well. Finding one that’s both durable and looks good is key. This blog post will help you pick the perfect dry erase paint for your needs.
By reading on, you’ll learn about different types of dry erase paint, how to prepare your surfaces, and tips for a smooth application. We’ll also cover the best ways to maintain your new dry erase space. Get ready to turn any wall into a creative canvas and discover the freedom of erasable brilliance! Let’s dive into the world of dry erase paint and unlock your inner artist or organizer.
Our Top 5 Dry Erase Paint Recommendations at a Glance
Top 5 Dry Erase Paint Detailed Reviews
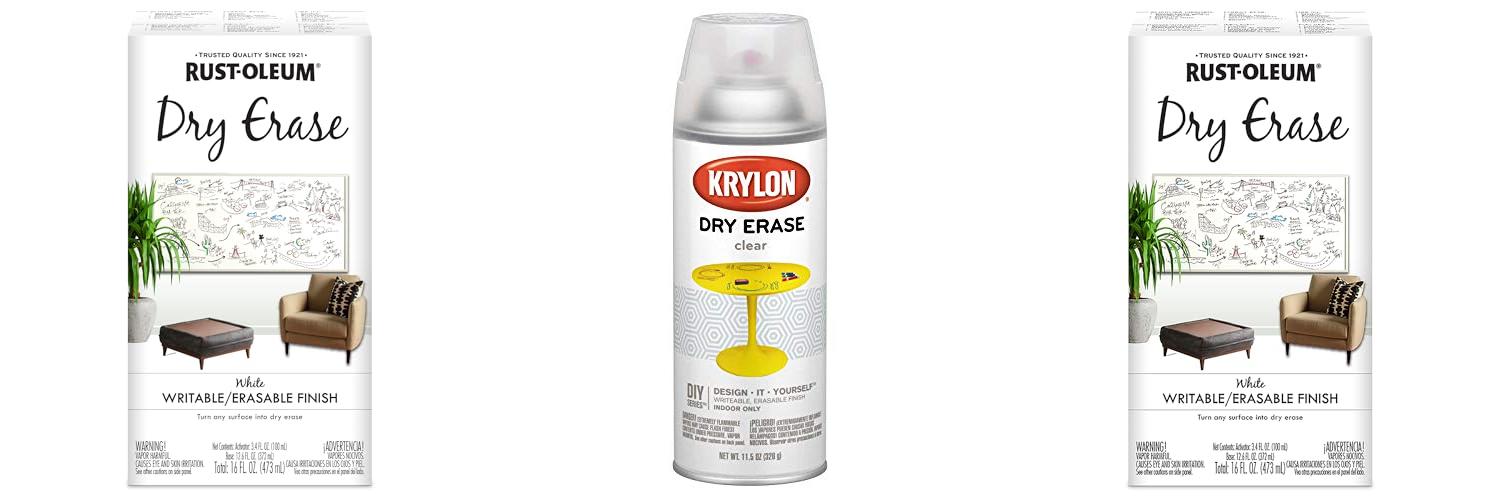
1. Rust-Oleum 241140 Specialty Dry Erase Brush-On Paint Kit

Rating: 8.6/10
The Rust-Oleum 241140 Specialty Dry Erase Brush-On Paint Kit is a fun way to make any surface writeable! This kit lets you turn walls, doors, and more into dry-erase boards. It is great for homes, offices, or classrooms. With a smooth, glossy finish, it is easy to write on and wipe clean. This kit is perfect for anyone who loves to brainstorm, make lists, or doodle!
What We Like:
- It can be used indoors on many things, like walls and cabinet doors.
- The paint dries quickly, in about an hour.
- It cleans up easily with soap and water.
- It covers a large area, up to 55 square feet.
- The surface is smooth and easy to write on.
What Could Be Improved:
- You need to mix two parts of the paint before you use it.
- You must wait three days after painting before you can use it.
This Rust-Oleum dry erase paint is a good choice for anyone wanting a writeable surface. You can have a fun and functional dry erase board with this product!
2. Krylon Dry Erase Spray Paint

Rating: 8.6/10
Want to transform any surface into a dry-erase board? Krylon Dry Erase Spray Paint makes it easy! This clear spray paint lets you create a writeable and erasable surface. It’s perfect for many projects. You can use it on wood, metal, plastic, and more. Krylon has been a trusted name in spray paint since 1947. This paint is easy to use and dries quickly, making it a great choice for DIY projects.
What We Like:
- Turns surfaces into dry erase boards.
- Works on many different materials.
- Easy to apply in one step.
- Dries fast, so you can use it quickly.
- Trusted brand with a long history.
What Could Be Improved:
- Requires good ventilation during use.
- May require multiple coats for the best results.
In conclusion, Krylon Dry Erase Spray Paint is a good way to create a dry-erase surface. It is a simple and effective solution for various projects.
3. 2-Pack of 16 oz Rust-Oleum 241140 White Specialty Dry Erase Paint

Rating: 8.8/10
Need a whiteboard surface? The 2-Pack of 16 oz Rust-Oleum 241140 White Specialty Dry Erase Paint is here. It transforms walls, doors, and more into writable spaces. The two-part system mixes easily. You can start painting right away. This paint is ideal for offices, classrooms, or homes. It allows you to brainstorm, make notes, and get creative.
What We Like:
- Easy mixing. Part A and Part B combine quickly.
- Ready to use. You can paint immediately after mixing.
- Creates a smooth, dry-erase surface.
- Great for offices, classrooms, and homes.
- Two cans provide ample coverage.
What Could Be Improved:
- May require multiple coats for best results.
- Surface preparation is key for a smooth finish.
This Rust-Oleum dry erase paint is a good option. It is simple to use. You can create a functional and fun space with this product.
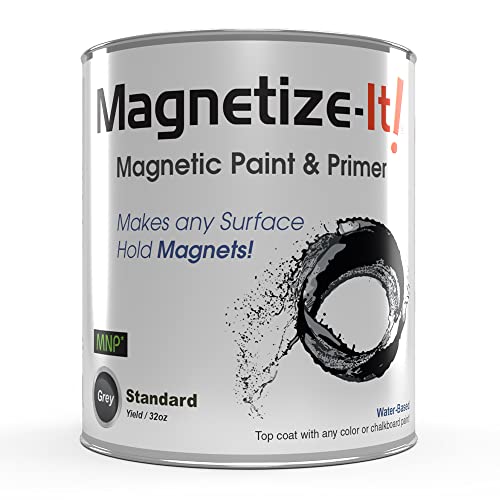
4. Magnetize-It! Magnetic Paint & Primer (Water Based) – Standard Yield 32oz
Rating: 9.5/10
Tired of thumbtacks and tape? Magnetize-It! Magnetic Paint & Primer (Water Based) – Standard Yield 32oz, MISTD-1530 lets you turn any surface into a magnet-friendly zone! This water-based paint and primer allows you to easily attach magnets. You can hang up artwork, notes, and more! It’s perfect for kids’ rooms, offices, and kitchens. This product is safe and easy to use. You can also top coat it with your favorite color paint or chalkboard paint.
What We Like:
- Makes any surface hold magnets!
- Great for displaying artwork and reminders.
- Works on many surfaces like wood and drywall.
- Safe for kids’ rooms.
- Allows for creative displays with magnetic letters and photos.
- Easy to top coat with your favorite paint color.
What Could Be Improved:
- Yield is limited. You may need more than one can for larger projects.
Overall, Magnetize-It! Magnetic Paint & Primer is a fun and practical product. It is a simple way to add magnetic functionality to your home or office.
5. Rust-Oleum 301450 Specialty Chalkboard Brush-On Paint

Rating: 9.1/10
Want a chalkboard anywhere? The Rust-Oleum 301450 Specialty Chalkboard Brush-On Paint lets you do it! This flat black paint transforms almost any surface into a chalkboard. You can write and draw with chalk. It works great on wood, metal, and other materials. This paint is perfect for homes, schools, or offices. It’s easy to apply and makes any space more fun.
What We Like:
- You can use it on many surfaces, like wood and metal.
- The paint dries fast, only taking 30 minutes.
- It creates a smooth surface that erases easily.
- The chalkboard is scratch-resistant.
- It covers a large area, up to 120 square feet.
- Clean up is simple with soap and water.
What Could Be Improved:
- This paint is only for indoor use.
- You need to wait 24 hours before using it.
Rust-Oleum Chalkboard Brush-On Paint is a fantastic way to add a chalkboard to your space. It’s simple to use and gives great results. Get ready to unleash your creativity!
Dry Erase Paint: Your Guide to Writing on Walls
Dry erase paint lets you turn almost any surface into a whiteboard! This guide helps you choose the best dry erase paint for your needs.
1. Key Features to Look For
Before you buy dry erase paint, consider these important features:
- Coverage: How much area can a can or kit cover? Check the label! You need to know if one can covers your wall.
- Durability: Does the paint last a long time? Look for paint that resists scratches and stains. Good quality paint is important.
- Ease of Application: Is the paint easy to apply? Some paints are roll-on, and others are spray-on.
- Color: Does the paint come in different colors? Many paints are white. Some offer clear options, too.
- Odor: Does the paint have a strong smell? Choose paints with low odor. This helps with your comfort.
- Dry Time: How long does it take to dry? You do not want to wait forever! Quick drying is best.
- Erasability: Does the paint erase easily? You want to remove your writing without trouble.
2. Important Materials
Dry erase paint usually has these materials:
- Base: This is the main part of the paint. It helps the paint stick to the surface.
- Pigments: These give the paint its color.
- Resins: These make the paint smooth and durable.
- Solvents: These help the paint flow and dry. Some paints are water-based.
- Hardener (in some kits): This makes the paint extra strong.
3. Factors That Improve or Reduce Quality
Several things affect the quality of dry erase paint:
- Ingredients: High-quality ingredients make better paint.
- Surface Preparation: You need to prepare the surface before painting. Clean the surface! Make it smooth. Sanding helps sometimes.
- Application: Follow the instructions carefully. Apply the paint evenly.
- Number of Coats: You might need more than one coat. This gives better coverage.
- Ventilation: Make sure the room is well-ventilated. This helps with the smell and drying.
- Brand Reputation: Some brands are known for good quality.
- Price: Often, you get what you pay for.
4. User Experience and Use Cases
Dry erase paint is great for many uses:
- Home Offices: Write notes, brainstorm ideas, and make to-do lists.
- Classrooms: Teachers use it for lessons and activities.
- Kids’ Rooms: Let kids draw and play!
- Kitchens: Create a place for grocery lists and reminders.
- Meeting Rooms: Use it for presentations and collaboration.
- Creative Spaces: Paint it on walls for art.
Dry erase paint is easy to use. Most paints come with instructions. You will likely need a roller or brush. You will need to let it dry. Then, you can write on it with dry erase markers. Wipe it clean with an eraser.
Dry Erase Paint: Frequently Asked Questions
Q: What surfaces can I paint?
A: You can paint many surfaces! This includes walls, doors, tables, and more. Make sure the surface is smooth and clean.
Q: Do I need to prime the surface?
A: Yes, often. Priming helps the paint stick better and gives a smooth surface.
Q: How many coats of paint do I need?
A: Usually, you need two or three coats. Follow the paint’s instructions.
Q: How long does it take to dry?
A: Dry time varies. Check the paint label! It may take a few hours or a day.
Q: What kind of markers should I use?
A: Use dry erase markers. These erase easily. Don’t use permanent markers!
Q: How do I clean the dry erase surface?
A: Use a dry erase eraser. You can also use a damp cloth.
Q: Can I use dry erase paint outdoors?
A: Some dry erase paints are for indoor use. Check the label. Some paints work outdoors.
Q: Is dry erase paint safe for kids?
A: Yes, most dry erase paints are safe. Always follow the manufacturer’s instructions. Make sure the room is well ventilated.
Q: How do I remove dry erase paint?
A: Removing dry erase paint is difficult. You might need special paint removers. Be careful and follow the product instructions.
Q: How long does dry erase paint last?
A: Dry erase paint can last for years! The lifespan depends on the quality of the paint and how you care for it.
In conclusion, every product has unique features and benefits. We hope this review helps you decide if it meets your needs. An informed choice ensures the best experience.
If you have any questions or feedback, please share them in the comments. Your input helps everyone. Thank you for reading.

I’m the recipe developer and food photographer behind Air Fryer at Tiffany’s. I’m also a wife, mom to two adventurous little boys, registered nurse, and live in the great Midwest. Join me as I show you new ways to use your air fryer that you never knew possible.