Imagine a table that’s not just furniture, but a piece of art. A table that’s tough enough for family dinners and beautiful enough to be a centerpiece. That’s the magic of epoxy resin! If you’ve seen those stunning, glossy tabletops with vibrant colors or even embedded objects, you’ve likely encountered epoxy resin. It’s a fantastic way to give old furniture new life or create something entirely unique.
But let’s be honest, diving into the world of epoxy resin for tables can feel a bit overwhelming. There are so many different types, brands, and additives out there. How do you know which one is best for your project? You might worry about getting it right, about bubbles, or about the finish not being as smooth as you hoped. Choosing the wrong product could lead to frustration and a less-than-perfect result.
Don’t worry! This blog post is here to guide you. We’ll break down exactly what you need to know to pick the perfect epoxy resin for your table project. You’ll learn about the different kinds available, what makes them special, and how to avoid common mistakes. By the end of this guide, you’ll feel confident in your choice and ready to create a table you’ll love for years to come.
Our Top 5 Epoxy Resin For Tables Recommendations at a Glance
Top 5 Epoxy Resin For Tables Detailed Reviews
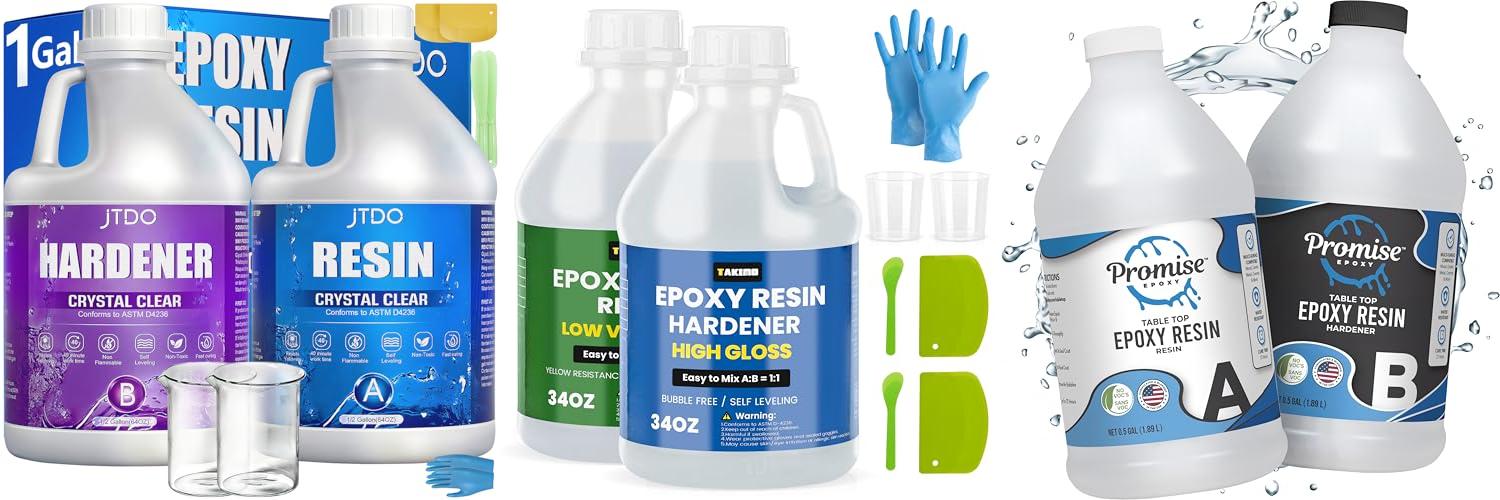
1. JTDO Epoxy Resin – 128OZ Crystal Clear

Rating: 9.0/10
Unleash your inner artist with the JTDO Epoxy Resin kit! This 1-gallon kit offers crystal-clear, self-leveling, and bubble-free results, perfect for all your DIY projects. Whether you’re crafting jewelry, coating a table, or creating stunning art, this UV-resistant resin delivers a high-gloss finish that stays clear and won’t yellow over time. It’s designed for ease of use, making it ideal for beginners and experienced crafters alike.
What We Like:
- Crystal-clear, high-gloss finish that resists yellowing.
- Self-leveling formula helps prevent bubbles for a smooth surface.
- Easy 1:1 mix ratio is simple for anyone to use.
- Fast curing time (24-48 hours) lets you finish projects quickly.
- Comes with a complete kit, including tools and gloves, so you can start right away.
- Versatile for many projects like art, jewelry, tables, and countertops.
- Meets safety standards (ASTM D-4236).
- Makes a fantastic gift for creative friends and family.
What Could Be Improved:
- Working time of 40 minutes might be a bit short for very large or complex projects.
This JTDO Epoxy Resin kit provides everything you need for beautiful, durable creations. It’s a fantastic choice for anyone looking to bring their artistic visions to life.
2. 68oz Crystal Clear Resin Kit

Rating: 8.5/10
Unleash your creativity with this 68oz Crystal Clear Resin Kit! This kit is designed for stunning results on all your DIY projects. Whether you’re a beginner or a pro, you can achieve a beautiful, glossy finish on tables, art pieces, and more.
What We Like:
- It’s super easy to use, even for beginners. Just mix equal parts of resin and hardener.
- The resin cures fast, usually within 8 to 24 hours, so you can finish your projects quickly.
- It stays crystal clear and won’t turn yellow over time. This means your creations will look amazing for a long time.
- You won’t get annoying bubbles! The special formula helps get rid of them fast.
- The finished product is very hard and has a shiny, glass-like look.
- It’s safe to use because it’s non-toxic, doesn’t smell bad, and isn’t flammable.
- It can handle heat up to 203℉ (95℃), making it great for tabletops.
- You have about 40 minutes to work with it before it starts to set, giving you plenty of time for detailed projects.
What Could Be Improved:
- For the best results in cold weather, you need to warm up the resin and hardener first.
- The instructions recommend not pouring more than 1/4 inch thick layers at a time.
This resin kit makes creating beautiful, durable art projects accessible to everyone. You’ll love the professional, high-gloss finish it provides.
3. Promise Epoxy Epoxy Resin Kit 1 Gal-Crystal Clear

Rating: 8.6/10
Get ready to elevate your DIY projects with the Promise Epoxy Epoxy Resin Kit! This 1-gallon kit is your go-to for creating stunning tabletops, beautiful crafts, and unique jewelry. It’s designed for both beginners and experienced crafters, making it super easy to achieve professional-looking results.
What We Like:
- Easy 1:1 Mixing Ratio: Perfect for everyone, from first-timers to seasoned pros.
- Food-Safe When Cured: Use it on your kitchen tables and counters with confidence.
- Self-Leveling Formula: It spreads out smoothly on its own, giving you a flawless, high-gloss finish without streaks.
- Crystal-Clear and UV Resistant: Your creations will stay bright and clear, protected from yellowing by the sun.
- Water-Resistant and Durable: It holds up well against moisture, keeping your projects looking great for a long time.
- American Made Quality: Backed by over 40 years of experience from a trusted USA company.
- Versatile Use: Works wonderfully with mica powders, silicone molds, and alcohol inks for endless creative possibilities.
What Could Be Improved:
- Cure Time: While durable, the curing process can take a few days for full hardness, so plan your projects accordingly.
- Ventilation: Like most epoxies, good ventilation is important during application to ensure the best results and a comfortable working environment.
This Promise Epoxy kit offers fantastic quality and ease of use for a wide range of creative endeavors. You’ll love the beautiful, durable finishes you can achieve with this American-made resin.
4. TotalBoat Table Top Epoxy Resin Kit – 1 Gallon Crystal Clear Epoxy with High Gloss & UV-Resistance – Easy 1:1 Ratio for Bar and Table Coating

Rating: 9.1/10
Ready to transform your furniture or create stunning resin art? The TotalBoat Table Top Epoxy Resin Kit is your answer. This 1-gallon kit delivers a crystal-clear, high-gloss finish that’s perfect for bar tops, tables, and all sorts of creative projects. It’s designed for both beginners and experienced crafters, making it super easy to get amazing results.
What We Like:
- It’s crystal clear and gives a beautiful high-gloss shine.
- The 1:1 mixing ratio is simple for everyone to follow.
- The epoxy is UV resistant and waterproof, so it lasts a long time.
- It’s BPA-free, making it safer for your home and food surfaces.
- You can use it for so many things like tables, counters, and art.
- It self-levels, which helps you get a smooth finish without much effort.
What Could Be Improved:
- You need to work in a specific temperature range (70-80°F) for the best results.
- There’s a limited working time of about 40 minutes after mixing.
- You have to wait several hours between adding layers.
This TotalBoat epoxy kit makes it easy to achieve professional-looking results on your projects. It’s a fantastic choice for anyone wanting to add a durable, beautiful finish to their work.
5. TAKIMO 1 Gallon 3×UV Resistant Resin Kit

Rating: 9.4/10
Transform your creative projects with the TAKIMO 1 Gallon 3×UV Resistant Resin Kit. This kit is designed for both beginners and experienced crafters, offering a crystal-clear, high-gloss finish that’s built to last. Whether you’re creating stunning river tables, unique resin art, or durable bar tops, this epoxy resin provides exceptional clarity and strength.
What We Like:
- Easy to Use: Mixes in a simple 1:1 ratio and cures quickly within 8-24 hours, making it great for beginners.
- No Bubbles: The improved formula includes a defoamer to prevent air bubbles, ensuring a smooth finish.
- 3x UV Resistant: Uses higher-grade materials for excellent yellowing resistance, keeping your projects looking fresh.
- High Gloss Finish: Achieves a hard, glass-like shine that enhances the beauty of your creations.
- Durable: Scratch and heat resistant up to 203℉ (95℃), making it suitable for various applications like tabletops.
- Safe to Use: Non-toxic, odorless, and non-flammable for a safer crafting experience.
What Could Be Improved:
- Layer Thickness Recommendation: It’s recommended to pour layers no thicker than 1/4 inch to ensure proper bubble elimination.
- Cold Weather Tip: Prewarming the resin and hardener is suggested for best results in cold weather.
The TAKIMO resin kit offers a user-friendly experience with impressive results. It’s an excellent choice for anyone looking to add a professional, long-lasting finish to their DIY projects.
Choosing the Perfect Epoxy Resin for Your Tabletop Project
Creating a beautiful epoxy resin table is a rewarding DIY project. It can transform a plain piece of wood into a stunning centerpiece. But with so many options available, how do you pick the right epoxy resin? This guide will help you make an informed decision.
1. Key Features to Look For
Durability and Hardness
You want a resin that dries hard and won’t scratch easily. Look for terms like “high-performance” or “hard-coat” on the packaging. A good resin will resist chips and cracks, keeping your table looking great for years.
UV Resistance
Sunlight can yellow and degrade some resins over time. Choose an epoxy with UV inhibitors. This feature protects your table from fading and discoloration, especially if it will be placed near a window.
Clarity and Non-Yellowing Properties
Most people want a crystal-clear finish. Opt for a resin that is specifically formulated for clarity. It should also state that it won’t yellow with age. This ensures your table’s color remains true.
Low Viscosity (for Pouring)
Viscosity refers to how thick or thin the resin is. For pouring large tables, a lower viscosity resin flows more easily. This helps it spread evenly and self-level. It also makes it easier to get rid of air bubbles.
Food-Safe Certification (if applicable)
If your table will be used for food, like a dining table or serving tray, you need a food-safe certified epoxy. This means it has been tested and is safe for contact with food.
2. Important Materials
Epoxy resin is typically a two-part system: a resin and a hardener. When mixed, they create a chemical reaction that hardens the mixture. Always follow the manufacturer’s instructions for mixing ratios.
- Resin: This is the liquid base that hardens.
- Hardener: This is the activator that makes the resin cure.
- Pigments and Dyes: These are added to color the resin.
- Additives: Some resins include additives for special effects like glitter or metallic powders.
3. Factors That Improve or Reduce Quality
Temperature and Humidity
The curing process is sensitive to temperature and humidity. A stable, warm environment (usually between 70-80°F or 21-27°C) is best for a smooth, bubble-free cure. High humidity can affect the finish.
Mixing Ratio and Thoroughness
Using the wrong mix ratio is a common mistake. It can lead to sticky spots or a resin that never fully hardens. Mix thoroughly but avoid over-mixing, which can introduce too many air bubbles.
Pouring Technique
Pouring too much resin at once can cause overheating and cracking. It’s often better to do multiple thinner pours. Proper ventilation is also important for a good cure and your health.
Surface Preparation
A clean, properly sealed surface is crucial. Any dust or debris will be trapped in the resin, ruining the finish. Sealing porous surfaces prevents bubbles from rising up from the wood.
4. User Experience and Use Cases
Epoxy resin tables are incredibly versatile. They are perfect for:
- River Tables: These tables feature a gap filled with colored or clear resin, resembling a river.
- Coasters and Trays: Smaller projects are great for beginners to practice their skills.
- Countertops: Durable and waterproof, epoxy makes excellent kitchen or bar countertops.
- Artistic Tabletops: You can embed objects, create swirling patterns, or use vibrant colors for a unique look.
A good user experience means the resin is easy to mix, pour, and cure. It should have minimal odor and a predictable outcome. Choosing a reputable brand with clear instructions will make your project much smoother.
Frequently Asked Questions (FAQ)
Q: What is the best epoxy resin for beginners?
A: For beginners, look for a “deep pour” epoxy. These resins are designed to be poured in thicker layers and typically have a longer working time, giving you more control.
Q: How much epoxy resin do I need for a table?
A: This depends on the size and thickness of your table. Most manufacturers provide a coverage calculator on their website or product packaging. Measure your table’s surface area and desired depth.
Q: How long does epoxy resin take to cure?
A: Cure times vary by product. Most epoxies are touch-dry in 24-72 hours, but they need several days or even a week to fully harden and reach maximum durability.
Q: Can I pour epoxy resin over an existing tabletop?
A: Yes, you can. Ensure the existing surface is clean, smooth, and properly sealed. This will help the epoxy adhere well and prevent bubbles.
Q: How do I get rid of air bubbles in epoxy resin?
A: The best ways are to mix slowly and gently, use a heat gun or torch briefly over the surface after pouring, or use a specialized de-bubbling spray. Some low-viscosity resins naturally release bubbles.
Q: Is epoxy resin waterproof?
A: Yes, once fully cured, epoxy resin is waterproof and resistant to most chemicals. This makes it ideal for surfaces that might get wet.
Q: Can I use any kind of wood with epoxy resin?
A: Most types of wood work well. However, very porous or oily woods might require extra sealing to prevent issues with adhesion or bubbling.
Q: What should I wear when working with epoxy resin?
A: Always wear gloves, safety glasses, and a respirator mask to protect yourself from fumes and skin contact. Work in a well-ventilated area.
Q: How do I clean up uncured epoxy resin?
A: Uncured resin can usually be cleaned up with isopropyl alcohol or acetone. Once cured, it is very difficult to remove.
Q: Can I repair a damaged epoxy resin table?
A: Yes, minor scratches or damage can often be repaired with a light sanding and another thin coat of epoxy resin.
In conclusion, every product has unique features and benefits. We hope this review helps you decide if it meets your needs. An informed choice ensures the best experience.
If you have any questions or feedback, please share them in the comments. Your input helps everyone. Thank you for reading.

I’m the recipe developer and food photographer behind Air Fryer at Tiffany’s. I’m also a wife, mom to two adventurous little boys, registered nurse, and live in the great Midwest. Join me as I show you new ways to use your air fryer that you never knew possible.