Have you ever seen a table that looks like a river flowing through wood? That’s often an epoxy resin table! They’re beautiful and unique. But choosing the right wood for this project can be tricky.
Picking the wrong wood can lead to problems. Some woods might not work well with the epoxy. They might warp, crack, or not look as good as you hoped. This can be a real headache and a waste of time and money. It’s important to get it right the first time!
This blog post will help you. We’ll explore the best wood choices for your epoxy table. You’ll learn about different wood types, how they react with epoxy, and what to look for. By the end, you’ll know how to choose the perfect wood for your dream table. Get ready to create something amazing!
Let’s dive into the world of wood and epoxy! First, we’ll look at some popular wood options. Then, we’ll talk about the things you need to consider when making your choice.
Our Top 5 Wood For Epoxy Table Recommendations at a Glance
Top 5 Wood For Epoxy Table Detailed Reviews
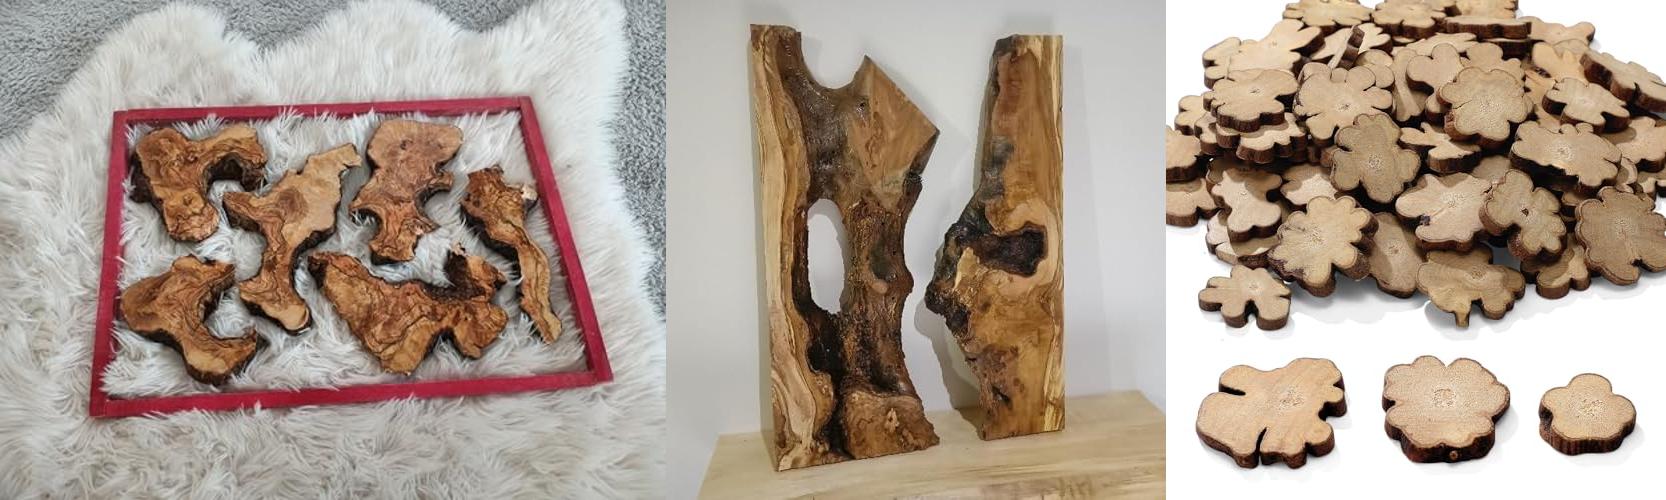
1. Varnished Olive Wood Slabs for Epoxy Projects 6 pcs 10 pcs 16 pcs (6 Pieces)

Rating: 9.0/10
Are you looking to create stunning epoxy resin projects? These Varnished Olive Wood Slabs are a fantastic choice! This set includes six pieces of beautiful olive wood. The wood is already sanded and varnished. This makes it ready for your creative projects. Each piece is between 6 and 10 inches long. The wood is a sturdy 1 inch deep. These slabs are perfect for coasters, serving boards, and more!
What We Like:
- The wood is already prepared. You don’t need to sand it yourself.
- The olive wood is beautiful. It adds a unique look to your projects.
- The slabs are a good size for many different projects.
- The wood is varnished. This protects the wood and makes it look great.
What Could Be Improved:
- The set only contains six pieces. You might need more for larger projects.
- The size of each piece can vary. This could be a problem for some projects.
The Varnished Olive Wood Slabs are a good product for epoxy projects. The ready-to-use slabs will make your work easier.
2. Live edge Rustic Wood Slab from Olive Wood 20″

Rating: 8.6/10
This gorgeous Live Edge Rustic Wood Slab from Olive Wood is a beautiful piece of nature. It’s perfect for adding a touch of rustic charm to your home. This slab is 20 inches long and has a minimum width of 10 inches. It’s about 1 inch thick. The wood is varnished, so it looks shiny and is protected. This olive wood slab is sure to become a unique conversation starter.
What We Like:
- The live edge is stunning and gives the wood character.
- The olive wood grain is beautiful and unique.
- The varnish protects the wood and makes it easy to clean.
- It’s a great size for a small table, a serving tray, or a decorative piece.
- The wood is durable and can last a long time.
What Could Be Improved:
- The minimum width could be wider for more uses.
- The price might be a little high for some people.
- The varnish might show scratches over time.
This Live Edge Rustic Wood Slab is a fantastic choice for anyone who loves natural wood. It’s a beautiful and unique piece that will add warmth to any room. You will enjoy having this in your home.
3. Gerrii 90 Pcs Irregular Wood Slices Log Slices for Centerpieces Small Unfinished Wood Craft Natural Tree Decoration for Table DIY Craft Art Christmas Ornament Engraving Cup Coaster Home Decor

Rating: 8.8/10
Get ready to unleash your creativity with the Gerrii 90 Pcs Irregular Wood Slices! These unique, unfinished wood slices are perfect for all sorts of DIY projects. You get a big pack of natural wood pieces in different sizes. They are perfect for adding a rustic touch to your crafts and home decor. You can decorate them any way you like, making them perfect for any project.
What We Like:
- You get 90 wood slices, so you have plenty to work with.
- Each slice is unique, like a fingerprint.
- The wood is natural and unpainted, ready for your creativity.
- They are the right size for many different projects.
- They add a cozy, rustic feel to your decorations.
- You can use them for Christmas, parties, and more!
What Could Be Improved:
- Some sizes might be too small for some projects.
These Gerrii wood slices are a great way to add a natural, handmade touch to your crafts. They offer a lot of creative possibilities for any crafting enthusiast.
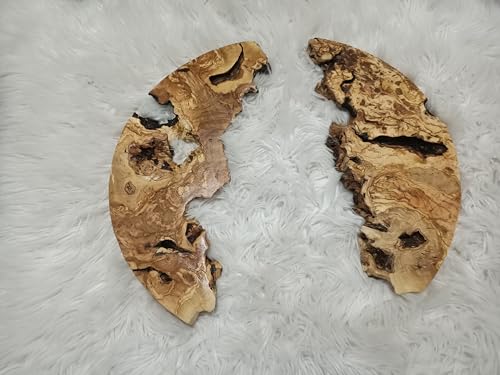
4. Live Edge Olive Wood Round Slab 20 inches for DIY and Epoxy River Table
Rating: 8.9/10
Get ready to create something amazing with this Live Edge Olive Wood Round Slab! This beautiful wood is perfect for your DIY projects. You can build an epoxy river table or a resin table. This set includes one slab of olive wood. It is ready for your creativity. The wood has a unique burl design. The set also includes two cross pieces.
What We Like:
- The wood is shining and varnished. It looks great!
- Each slab is unique. No two are alike.
- The set has two cross pieces.
- The diameter is 20 inches.
- You can contact the seller to pick your perfect slab.
What Could Be Improved:
- The width changes. It is at least 10 inches when combined.
- The wood depth is only 1 inch.
This Live Edge Olive Wood Round Slab is a great choice for woodworkers. It is perfect for making beautiful tables. You can create something unique!
5. Large Resin Molds for Epoxy Resin

Rating: 8.7/10
Create beautiful epoxy resin projects with this large, reusable mold! This epoxy resin mold is perfect for making coffee tables, river tables, trays, and more. The kit comes with everything you need to get started, including a large rectangular mold, pressure bars, clamping blocks, a rubber hammer, and a hardware tool kit. The mold is designed to be easy to use and will help you make stunning, professional-looking resin creations. This mold is great for both beginners and experienced resin artists.
What We Like:
- The package includes everything you need.
- The adjustable leveling design ensures a level pour.
- The T-shaped sliding rail design secures your wood board.
- The demountable design makes removing your project easy.
- It’s made of sturdy materials and is reusable.
- The 3-inch depth gives you lots of space for your designs.
What Could Be Improved:
- You need to use silicone caulk to seal the seams.
This epoxy resin mold is a great choice for anyone who wants to make their own resin tables and other projects. It’s easy to use and gives you a lot of creative freedom. This mold is a must-have for any resin artist.
Crafting Your Epoxy Masterpiece: A Wood Buying Guide
Are you dreaming of a stunning epoxy resin table? Choosing the right wood is super important! This guide will help you pick the perfect wood for your project.
Key Features to Look For
Before you buy, you need to know what makes good wood. Here are some key features to consider:
- Wood Species: Different woods have different looks and properties. Some are better for epoxy than others.
- Moisture Content: This is how wet the wood is. You want wood that is dry. Dry wood is less likely to warp or crack.
- Stability: How well the wood keeps its shape matters. Look for wood that is less likely to change over time.
- Grain Pattern: This affects how the wood looks. Some people love straight lines, others like wild, swirly patterns. Pick what you like!
- Thickness: The wood needs to be thick enough to hold the epoxy and your table’s weight.
- Size and Shape: Consider the size and shape of your table. Do you need a whole slab or smaller pieces?
Important Materials You’ll Need
Besides the wood, you’ll need other materials. These materials help you create a great epoxy table:
- Wood: Obviously! Choose the species and size you need.
- Epoxy Resin: This is the clear, liquid stuff that hardens. Get the right kind for your project.
- Hardener: This mixes with the epoxy to make it harden.
- Mixing Containers and Sticks: You’ll need these to mix the epoxy and hardener.
- Measuring Tools: Accurate measuring is important.
- Safety Gear: Always wear gloves, eye protection, and a mask.
- Clamps: These hold the wood in place while the epoxy dries.
- Sandpaper: You’ll need this to smooth the wood.
- Sealer: Some people use a sealer to protect the wood.
- Finishing Oil or Varnish: These protect the finished table.
Factors That Improve or Reduce Quality
Some things make wood better for epoxy tables. Other things can ruin it.
What Makes Wood Better:
- Dry Wood: Dry wood is less likely to warp. You can use a moisture meter to check.
- Stable Wood: Wood that doesn’t change shape easily makes a better table.
- Wood Free of Defects: Knots and cracks can be okay, but they can also cause problems.
- Properly Prepared Wood: You need to sand and clean the wood before you pour the epoxy.
What Reduces Quality:
- Wet Wood: Wet wood will warp and crack.
- Wood with Large Knots or Cracks: These can be hard to fill with epoxy.
- Poorly Prepared Wood: If you don’t sand and clean the wood, the epoxy might not stick.
- Low-Quality Wood Species: Some woods are not as strong or stable.
User Experience and Use Cases
Making an epoxy table can be a fun project. Here are some things to keep in mind:
- Think about the look: What kind of wood and epoxy color do you want?
- Consider the size and shape: How big should your table be?
- Prepare your workspace: You need a clean, flat surface.
- Follow the instructions: Read the epoxy instructions carefully.
- Take your time: Don’t rush the process.
- Be patient: Epoxy takes time to cure.
- Enjoy the process: Making an epoxy table is a great DIY project!
Epoxy tables are great for many uses. You can use them as dining tables, coffee tables, or even desks. They can look modern or rustic. They are beautiful and unique!
Frequently Asked Questions
Here are some answers to questions you might have:
Q: What’s the best wood for an epoxy table?
A: Many woods work! Popular choices include walnut, maple, oak, and cherry. Each has a different look.
Q: How do I choose the right wood species?
A: Think about the look you want. Consider the wood’s grain, color, and stability.
Q: How important is the wood’s moisture content?
A: Very important! You want dry wood. This stops warping and cracking.
Q: Where can I buy wood for an epoxy table?
A: You can buy wood from lumber yards, specialty wood stores, or online.
Q: How do I prepare the wood before pouring epoxy?
A: You need to sand the wood. Then, clean it to remove dust.
Q: What kind of epoxy should I use?
A: Get epoxy that is made for tables. Read the instructions carefully.
Q: How long does it take for epoxy to cure?
A: It depends on the epoxy. Usually, it takes several days to a week.
Q: Can I use any wood for an epoxy table?
A: You *can* use most wood types. However, some are better than others.
Q: What safety gear do I need?
A: You need gloves, eye protection, and a mask.
Q: How do I finish my epoxy table?
A: You can sand the surface. Then, apply a finishing oil or varnish.
In conclusion, every product has unique features and benefits. We hope this review helps you decide if it meets your needs. An informed choice ensures the best experience.
If you have any questions or feedback, please share them in the comments. Your input helps everyone. Thank you for reading.

I’m the recipe developer and food photographer behind Air Fryer at Tiffany’s. I’m also a wife, mom to two adventurous little boys, registered nurse, and live in the great Midwest. Join me as I show you new ways to use your air fryer that you never knew possible.